|
|
|
|
Most of us have probably heard of modular benchwork. I decided to take that
concept one step further with what I call "modular scenery". This method has
2 major benefits:
1. It can be completed at the workbench. This is great because it is much
less tiring than standing on your feet for prolonged periods of time at
the layout creating the scenery. Additionally, because you're working on it
at the workbench, you're able to take greater care with making it look better.
This particular module will be at the back of a 4' wide section of benchwork, so
making it in place would have been very difficult (which is what inspired this
method in the first place).
2. It's reusable. I've torn my layout down several times, and each time the
scenery gets destroyed. This piece of scenery can be easily reused on the
next layout.
This method of scenery worked out great for me, and I plan to do other modules
as well. Once they're all in place, it'll be a simple matter of bridging
the space between them with a little scenery to tie it all together.
So, just follow along with the following 9 steps (sorry about the screen
having to scroll from left to right, but wanted to get all the pics on one page).
|
|
|

|
|
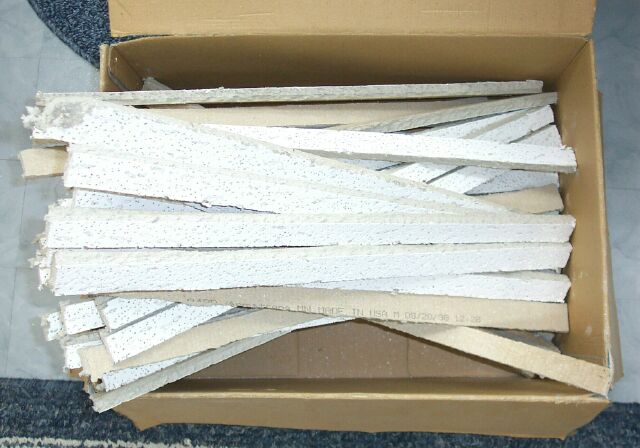
STEP 1. Take a 2' x 4' ceiling tile and cut it up into about 1" strips along the 2' side.
|
STEP 2. Using a piece of 1/8 masonite as the backboard and cut to the shape that you want the module to be in, begin building the rock face up from the bottom. Use Liquid Nails and lay a bead of it along the top of the previous row, and also along back of the masonite.
|
|
|
|
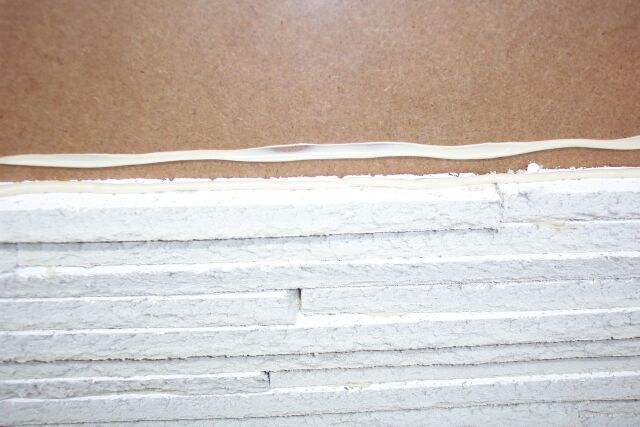
STEP 3. Here's a detail shot showing the Liquid Nails applied to the top of the previous row and the masonite in preparation to lay the next row in.
|
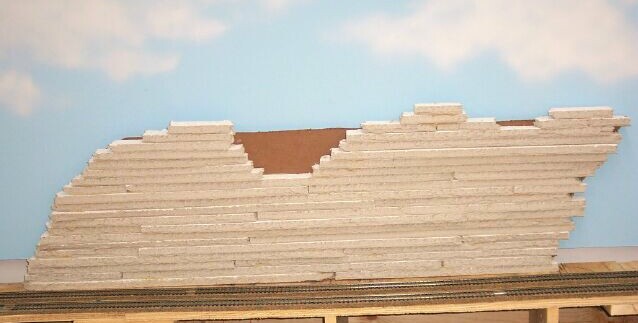
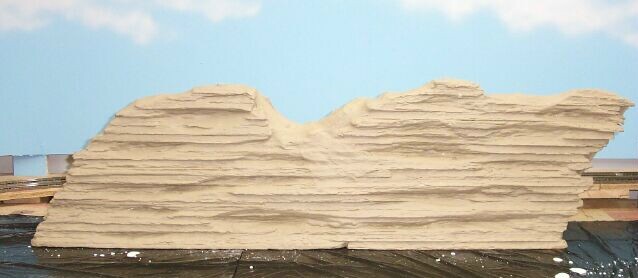
STEP 4. Here's the completed rock wall after all tile has been applied.
|
|
|
|
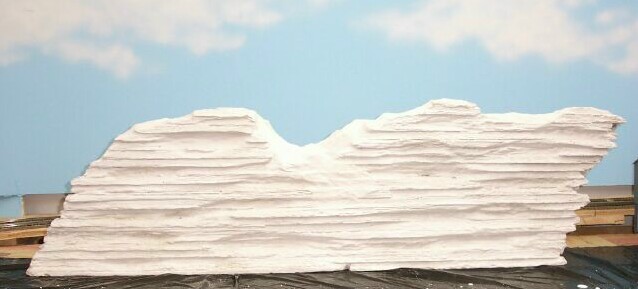
STEP 5. Using a wire brush and utility knife, carve up the face of the rock. Create some deep clefts in the rock face so that it is not all uniform. The masonite backboard has also been cut away in the middle of the top by using pliers to just "chew" it out. Woodland Scenics plastercloth has been used across the top. After that I created a slurry of plaster of paris and painted it on the rock face to tie it all together.
|
STEP 6. Paint the rock face with a tan color to serve as the basic undercoat.
|

|
|
|
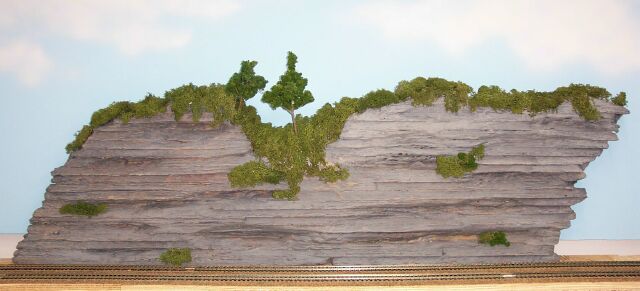
STEP 7. After the tan paint has dried, use a gray acrylic paint that has some water added to it. Paint this on so that the tan can show through in places and make the rock face look like it's not just one solid color.
|
STEP 8. Using white glue, glue lichen along the top of the module and in various places along the rock face. Try to make it not look to uniform. I also added a couple of trees along the top, and will probably add a few more. When starting your next module, just take the masonite background that you're going to start with, and cut the edge along a diagonal so that the generally look similar. You can then use lichen to "patch" the two edges together.
|
|